This guide provides detailed, step-by-step instructions on how to use and deploy Upstash Workflow with Cloudflare Workers. You can also explore our Cloudflare Workers example or Hono.js Cloudflare Workers example for detailed, end-to-end examples and best practices.

Prerequisites

  1. An Upstash QStash API key.
  2. Node.js and npm (another package manager) installed.

If you haven’t obtained your QStash API key yet, you can do so by signing up for an Upstash account and navigating to your QStash dashboard.

Step 1: Installation

First, install the QStash SDK in your worker project:

Terminal
npm install @upstash/qstash

Step 2: Configure Environment Variables

Create a .dev.vars file in your project root and add your QStash token. This key is used to authenticate your application with the QStash service.

Terminal
touch .dev.vars

Open the environment file and add your QStash token, as well as the environment you’re running in:

.dev.vars
QSTASH_TOKEN=xxxxxxxxx
ENVIRONMENT=development

Replace xxxxxxxxx with your actual QStash token found here:

Step 3: Create a Workflow Endpoint

A workflow endpoint allows you to define a set of steps that, together, make up a workflow. Each step contains a piece of business logic that is automatically retried on failure, with easy monitoring via our visual workflow dashboard.

To define a workflow endpoint with Cloudflare Workers, navigate into your workers entrypoint file (usually src/index.ts) and add the following code:

src/index.ts
import { serve } from "@upstash/qstash/cloudflare"

interface Env {
  ENVIRONMENT: "development" | "production"
}

export default {
  fetch: serve<{text: string}>(
    async (context) => {
      const initialPayload = context.requestPayload.text

      const result = await context.run("initial-step", async () => {
          console.log(`Step 1 running with payload: ${initialPayload}`)

          return { text: "initial step ran" }
        }
      )

      await context.run("second-step", async () => {
        console.log(`Step 2 running with result from step 1: ${result.text}`)
      })
    }
  )
}

Step 4: Run the Workflow Endpoint

To start your worker locally, run the following command:

Terminal
npm run wrangler dev

Executing this command prints a local URL to your workflow endpoint. By default, this URL is http://localhost:8787.

You can verify your correct environment variable setup by checking the wrangler output, which should now have access to your QSTASH_TOKEN binding and log your local URL:

For QStash, a tool that’s used to run a workflow under the hood, we need to provide a publically accessible URL. You can easily forward your localhost URL to a live URL by following our guide about setting up your workflow endpoint for local development.

Once you have a live URL, proceeed with either one of the following steps:

Set your publically accessible URL as an environment variable. This variable is only needed for local development and doesn’t need to be set in production:

.dev.vars
UPSTASH_WORKFLOW_URL=https://<YOUR_NGROK_OR_TUNNEL_URL>/

Using the baseUrl option

As an alternative to setting an environment variable, you can also use the baseUrl option in the serve method. This option is only needed for local development and can be omitted in production:

src/index.ts
import { serve } from "@upstash/qstash/cloudflare"

interface Env {
  ENVIRONMENT: "development" | "production"
}

export default {
  async fetch(req: Request, env: Env, ctx: ExecutionContext) {
    const handler = serve(
      async (context) => { ... },
      {
        // publically accessible base url needed for local development
        baseUrl: env.ENVIRONMENT === "development"
          ? "https://<YOUR_NGROK_OR_TUNNEL_URL>/"
          : undefined,
      }
    );
    return await handler(req, env)
  },
};

Triggering the workflow

After setting your live URL as the environment variable or baseUrl option, trigger your workflow by sending a POST request. For each workflow run, a unique workflow run ID is returned:

Terminal
curl -X POST https://<YOUR_NGROK_OR_TUNNEL_URL>/ -D '{"text": "hello world!"}'

# result: {"workflowRunId":"wfr_xxxxxx"}

Use this ID to track the workflow run and see its status in your QStash workflow dashboard. All steps are listed with their statuses, headers, and body for a detailed overview of your workflow from start to finish. Click on a step to see its detailed logs.

Step 5: Deploying to Production

When deploying your Cloudflare Worker with Upstash Workflow to production, there are a few key points to keep in mind:

  1. Environment Variables: Make sure that all necessary environment variables from your .dev.vars file are set in your Cloudflare Worker project settings. For example, your QSTASH_TOKEN, ENVIRONMENT, and any other configuration variables your workflow might need.

  2. Remove Local Development Settings: In your production code, you can remove or conditionally exclude any local development settings. For example, the baseUrl option in the serve function can be omitted in production:

src/index.ts
import { serve } from '@upstash/qstash/cloudflare'

interface Env {
  ENVIRONMENT: 'development' | 'production'
}

export default {
  async fetch(req: Request, env: Env, ctx: ExecutionContext) {
    const handler = serve(
      async (context) => { ... },
      {
        // baseUrl is not necessary in production
        baseUrl: env.ENVIRONMENT === 'development'
          ? 'https://<YOUR_NGROK_OR_TUNNEL_URL>/'
          : undefined,
      },
    );
    return await handler(req, env);
  },
}
  1. Deployment: Deploy your Cloudflare Worker to production as you normally would, for example using the Cloudflare CLI:

    Terminal
    wrangler deploy
    
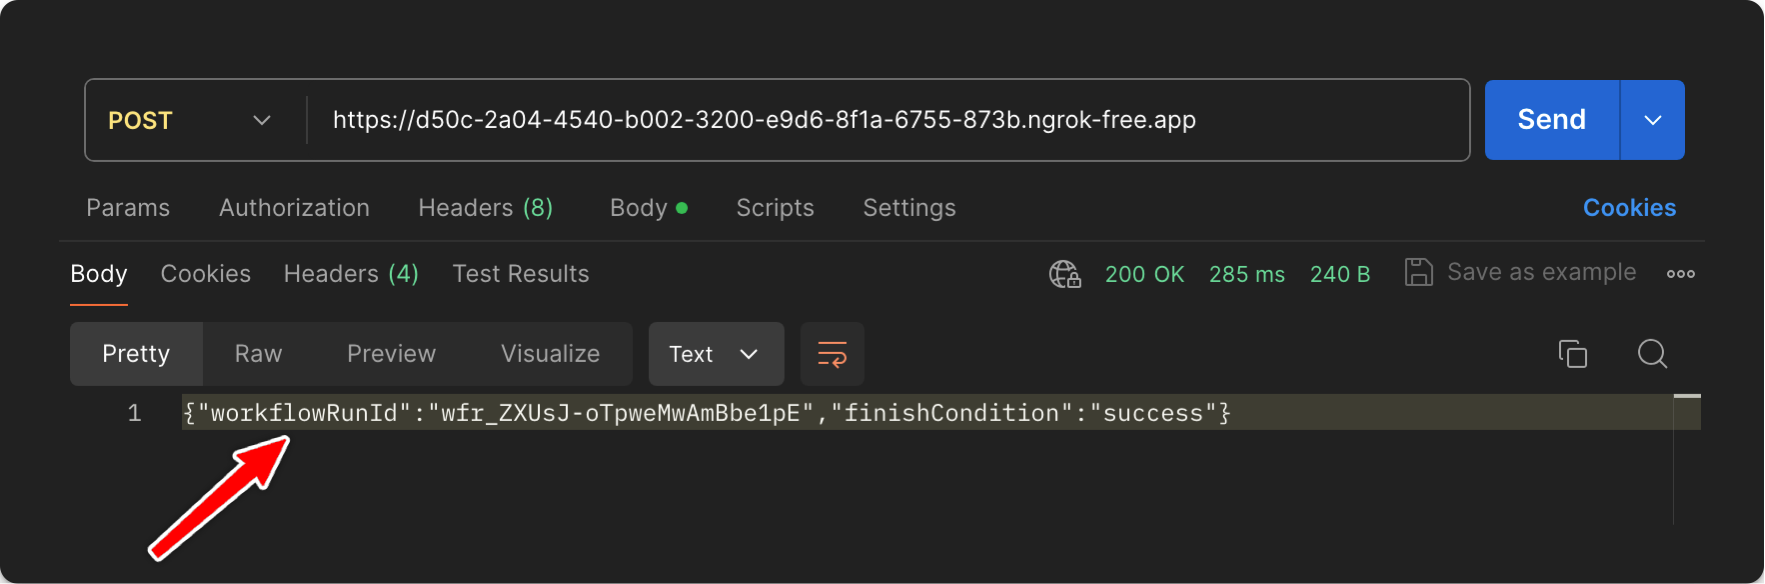
  2. Verify Workflow Endpoint: After deployment, verify that your workflow endpoint is accessible by making a POST request to your production URL:

    Terminal
    curl -X POST https://<YOUR-PRODUCTION-URL>/ -D '{"text": "hello world!"}'
    
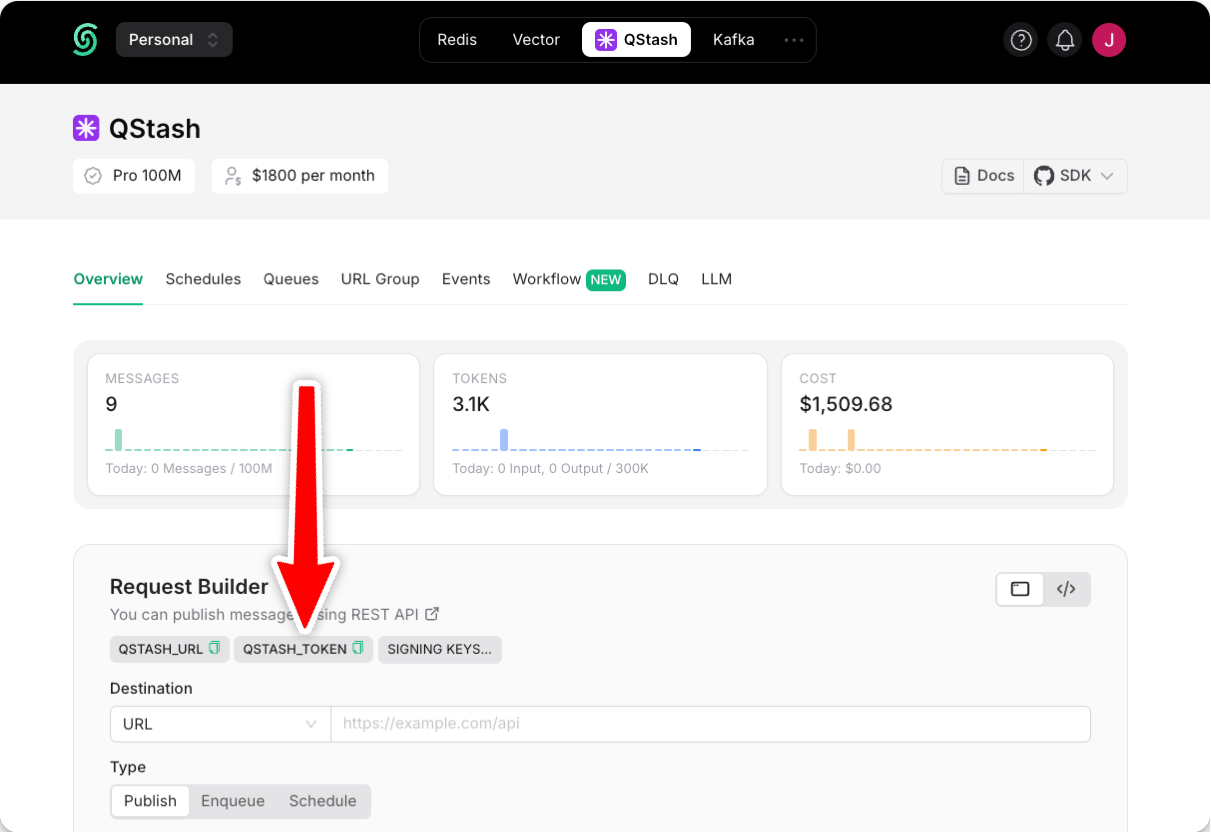
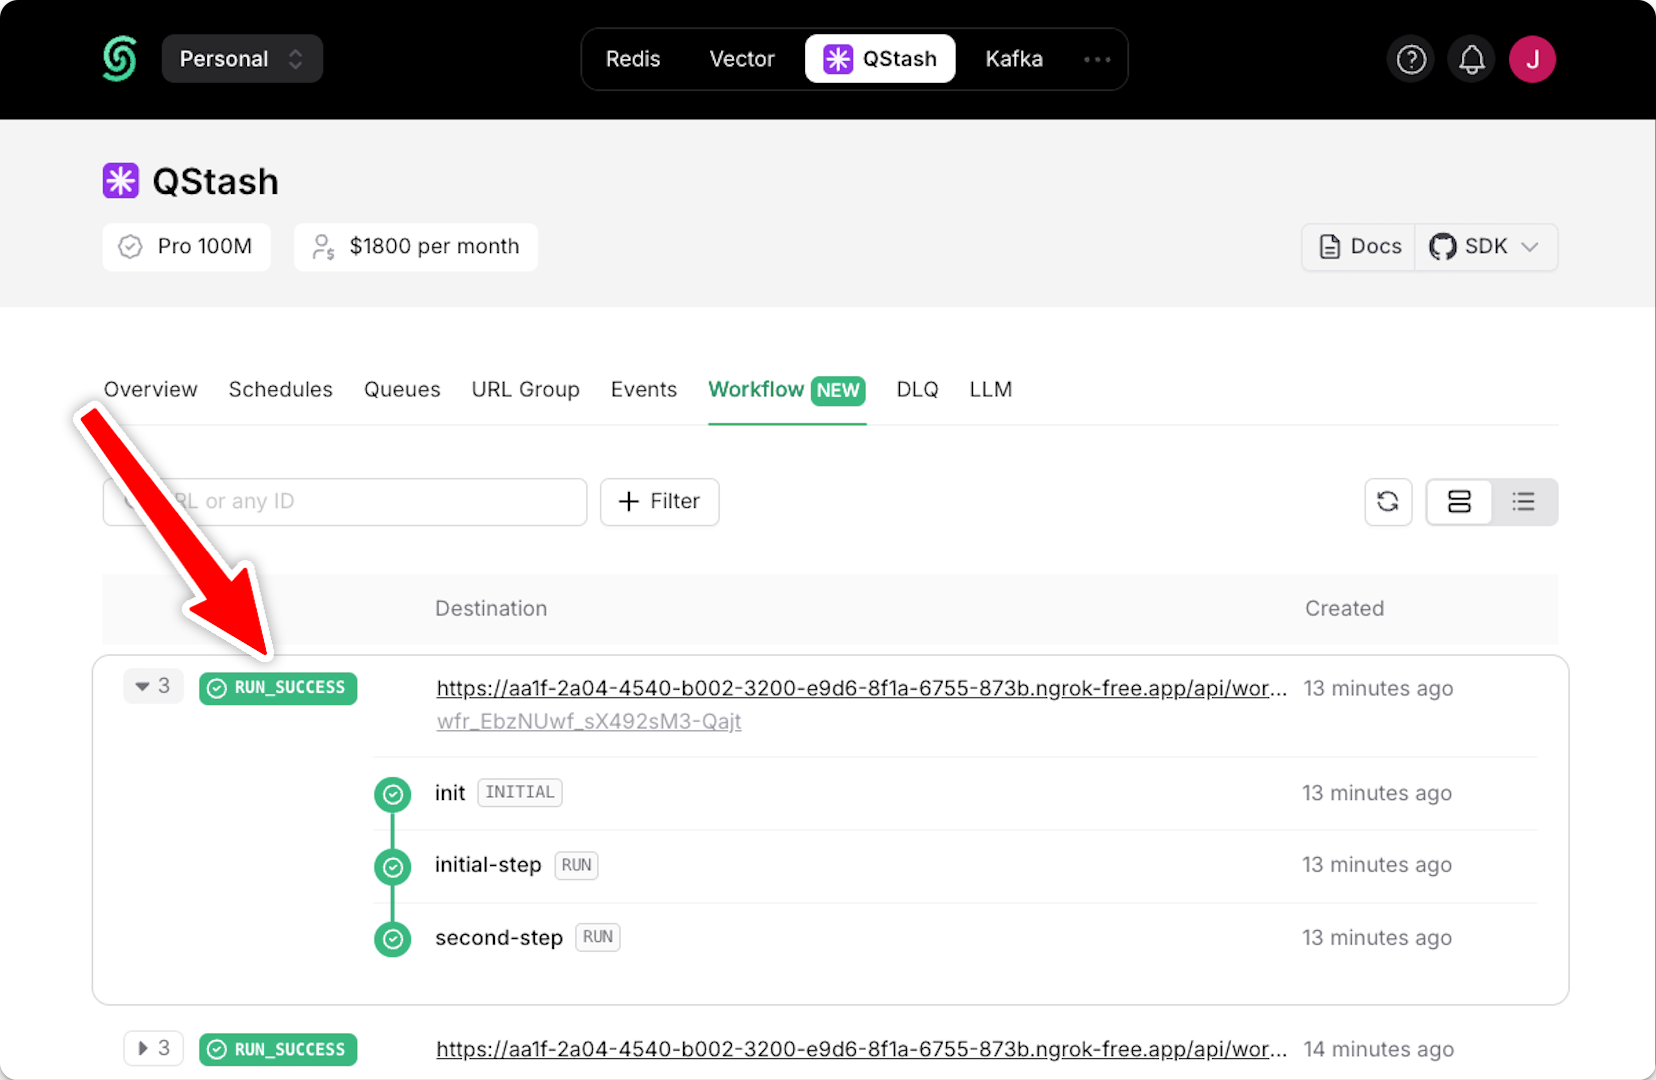
  3. Monitor in QStash Dashboard: Use the QStash dashboard to monitor your production workflows. You can track workflow runs, view step statuses, and access detailed logs.

  4. Set Up Alerts: Consider setting up alerts in Sentry or other monitoring tools to be notified of any workflow failures in production.

Next Steps

  1. Learn how to protect your workflow endpoint from unauthorized access by securing your workflow endpoint.

  2. Explore our Cloudflare Workers example for a detailed, end-to-end example and best practices.

  3. For setting up and testing your workflows in a local environment, check out our local development guide.